Working with vintage blocks does have its challenges. When I started to sew the first Maple Leaf pieced block to a plain muslin block, I found that the pieced block was slightly larger than the plain block. Forty years ago I didn’t have the luxury of the rotary cutters, rulers and mats that we have now. I used the cardboard from a cereal box to make templates the size of the finished pieces, placed the templates on the back of the fabric, traced around each one with pencil, and then cut 1/4″ outside the marks. I then carefully pinned and stitched each seam on the pencil marks.
So why weren’t my pieced blocks the size they were supposed to be? I had so painstakingly crafted each one. Then suddenly I realized that I had not allowed for the width of the pencil lead. Since there were seams in the pieced block and none in the plain block, the pencil lead widths had added more to the size of the pieced block.
Now for some reason I had not noticed this when I hand stitched all of the blocks together into the original quilt top. I probably did some slight easing but don’t remember. But this was a problem when sewing the blocks together by machine. And some of the blocks were uneven on the edges. Now how did that happen?
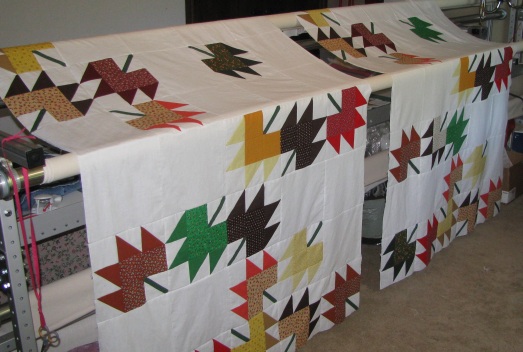
So after carefully pressing each one, I got out my rotary cutter, mat, and the 12 1/2″ square ruler and started squaring up each block. Now the pieced blocks will play nicely with the plain blocks. And a couple of days later, I had two 55″ x 77″ quilt tops sewn together and ready to mark for quilting.
I use Crayola Ultra-clean markers to mark my quilts but not until after testing on my fabrics. And I especially was concerned about these fabrics because they are 40 years old and was most likely manufactured somewhat differently than today’s fabrics. So now I’m up against another challenge. How am I going to test the markers on the fabrics if I don’t have any scraps to test?
Well, I have some blocks left with all the fabrics used except for the greens, the burgundys and the rusts. The markers won’t show up on dark colors so most of the greens weren’t going to be a problem anyway nor were the burgundys. So I decided that if the marker came out of all of the other fabrics, it would most likely come out of all of the fabrics. So I set up my test.
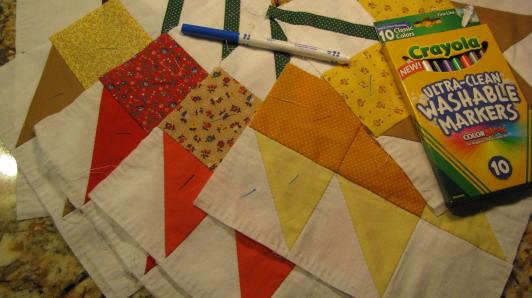
I decided on the blue because my black is almost gone and the blue showed up on the fabrics almost as well. After making a mark on each fabric, I put the blocks in my sink full of warm, soapy water. I did have to rub the fabrics together some, but not too much. All came out, so I’m good to go on marking my quilting design on each quilt top.

I am searching for just the right fabric for the backing and binding. After I have that on hand and ready to go, I will mark the quilt tops for quilting. I don’t like to leave the marks on the fabric any longer than absolutely necessary. You know, just in case.
Now……..what to do with the remaining blocks……………………………..
Happy quilting,
Lana

Cheryl Parker
A small wall quilt and a pillow. That takes care of the extra blocks. Or, you could make a table runner.
LikeLike
Lana's Lark
Thanks, Cheryl. Great ideas! I will have another post soon telling what I did decide to do with them.
LikeLike